Jul 22, 2026
How to Upload Files in Framer — Add Cloud-Powered File Uploads (No Code Needed)

Add advanced file upload features to your Framer site without touching code.
Press enter or click to view image in full size
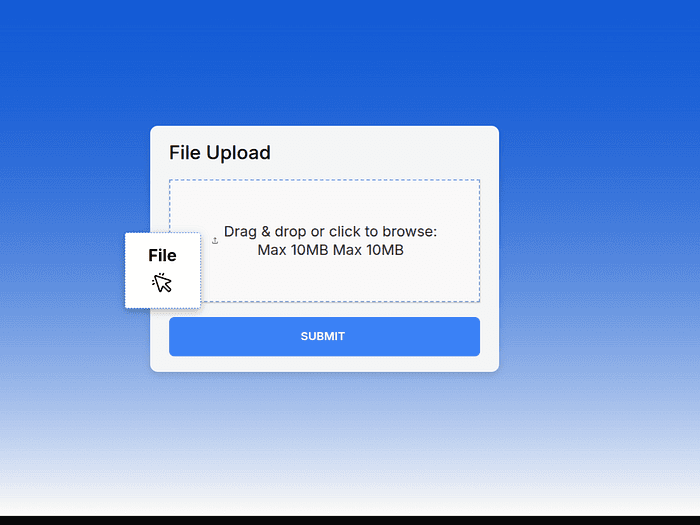
Forms are an essential part of any business, whether you are collecting inquiries, client quotes, or Appointments. While Framer forms are powerful and easy to use, they dont support file uploads out of the box.
In this guide, I’ll show you exactly how to add file upload functionality to your Framer forms using Cloudinary and the File Uploader component.
By the end of this tutorial, you will be able to :
Drag and drop files (videos, PDFs, or audio) in your Framer forms .
See upload progress and previews (for images)
Store files securely in the cloud
Getting Started
Before we dive in, make sure you’ve added the File Uploader component to your project.
Copy the component into your Framer project and add it inside a Framer Form. Get the component here
Go to Cloudinary and create a Free Cloudinary Account.
In your dashboard area, copy your Cloud Name and take note of it; we will need it later.
Create an upload preset (One-time setup)
In your Cloudinary console dashboard,
Go to Settings → Upload.
Click Upload Presets → Add Upload Preset or edit the existing one. Take note of the preset name.
Set Signing Mode to Unsigned. You can also set a folder name for your files.
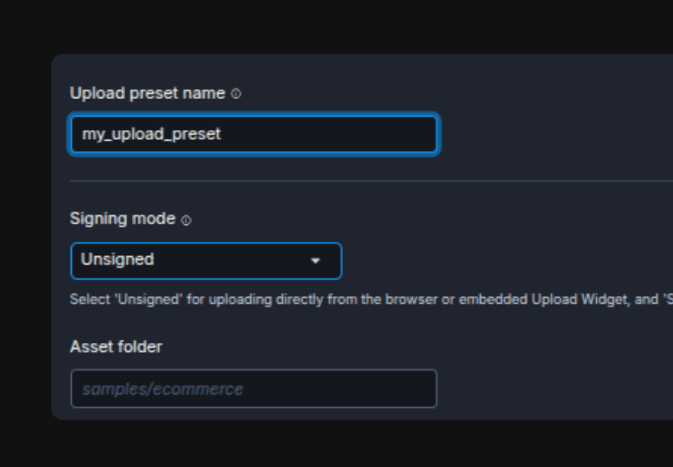
Cloudinary preset settings
In the Optimize and Deliver section, add only the file types you want users to upload.
From the Optimize section, only add the formats you actually want to allow, each separated by a comma. If you want images only, make sure only image file types are listed and nothing else.
Press enter or click to view image in full size
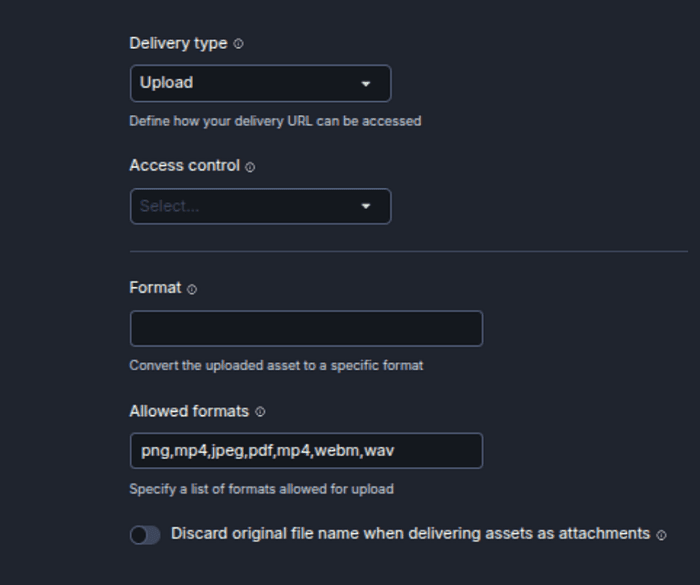
cloudinary file settings
Examples:
• Images only → jpg,jpeg,png,webp
• Images + PDFs → jpg,jpeg,png,webp,pdf
• Audio only → mp3,wav,m4a
• Video only → mp4,mov,webm
PDF Settings
If you want to allow PDF uploads, you must enable PDF delivery in Cloudinary:
Go to Cloudinary Console → Settings → Security.
Turn on “Allow delivery of PDF and ZIP files.”
Save your changes
This is required in addition to adding PDF in your Allowed Formats list in your Upload Preset.
Press enter or click to view image in full size
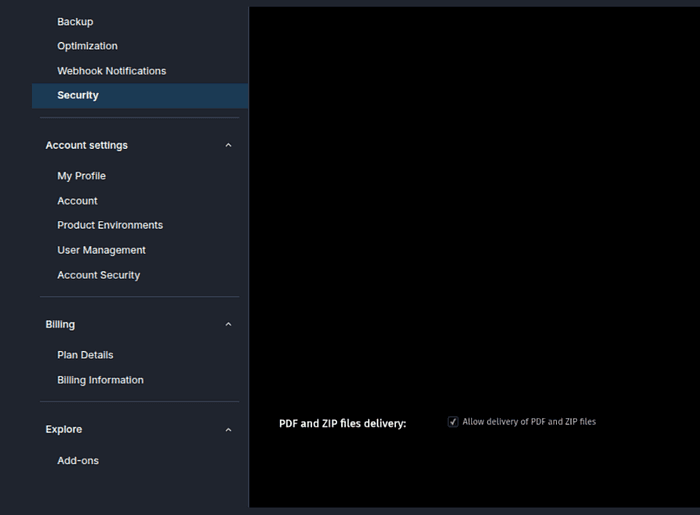
Cloudinary PDF settings
Connect Cloudinary settings in Framer.
In the Properties panel of the file upload component,
Paste your Cloudinary Cloud Name
Paste your Cloudinary Upload Preset name
Choose the File Type– Max File Size (10MB for images/PDFs/audio · up to 100MB for video)
Customise the rest of the properties to match the rest of the inputs, i.e., placeholder text, colors, font, border, padding ,e.t.c
Press enter or click to view image in full size
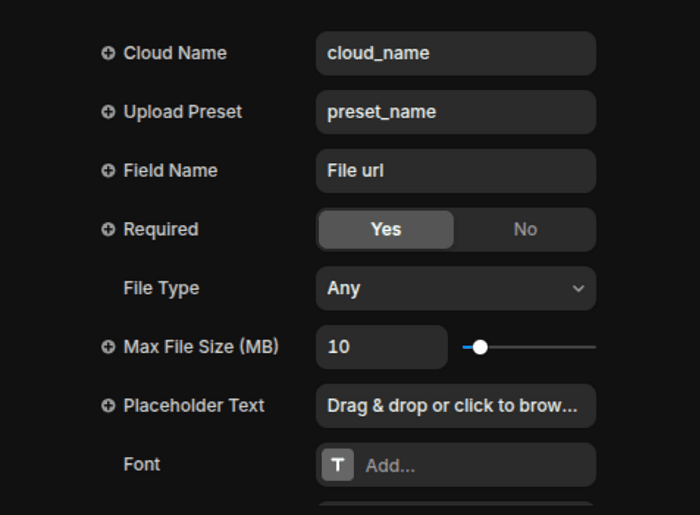
File upload framer component
Publish & Test
Your Framer form is now ready to upload files. Framer supports various ways to send form data, and whichever backend you choose, the file link will be attached to the submissions.
Ensure everything works perfectly before you publish your form to your users.
Conclusion
You are now done setting up file uploads in your Framer forms. You don’t need to worry about file storage, handling uploads, or building a backend. Framer takes care of the form, and Cloudinary handles the files.
You can preview the component here
It’s a clean, scalable way to add file uploads to any project.